


Transform your lawn by learning how to plant Bermuda grass sprigs. This comprehensive guide walks you through every essential step, from preparing your soil to ongoing care. Discover the best planting times and techniques for establishing a beautiful, healthy Bermuda grass lawn that thrives in warm climates.
How to Plant Bermuda Grass Sprigs
So, you’re dreaming of a lush, green lawn that can withstand the summer heat and heavy foot traffic. Bermuda grass might be your answer! While you can buy sod or use seed, planting Bermuda grass sprigs offers a cost-effective and rewarding way to establish a beautiful, resilient turf. This guide will walk you through everything you need to know, from preparing your soil to celebrating your new, vibrant lawn. Planting Bermuda grass sprigs might seem like a lot of work, but with the right approach, you can achieve fantastic results.
You’re about to learn how to plant Bermuda grass sprigs successfully. We’ll cover selecting the right time, preparing your ground like a pro, the actual planting process, and how to care for your new sprigs so they grow into a thick, healthy lawn. Get ready to transform your yard into a green oasis!
Key Takeaways
- Site Preparation is Crucial: Thoroughly clearing the area of weeds and debris, along with proper soil cultivation, is the foundation for successful Bermuda grass sprig establishment.
- Timing is Everything: Planting Bermuda grass sprigs is best done when soil temperatures are consistently warm, typically late spring through early summer, to encourage rapid growth.
- Proper Planting Technique: Digging shallow holes or furrows and ensuring good soil contact with the sprigs is vital for root development and survival.
- Consistent Watering is Key: Newly planted sprigs require frequent, light watering to keep the soil moist but not waterlogged, promoting germination and establishment.
- Fertilizer Application: Introducing starter fertilizer at planting and following up with balanced lawn fertilizers during the growing season supports healthy growth.
- Weed Control is Essential: Actively managing weeds from the outset prevents them from competing with your young Bermuda grass for resources.
- Patience and Persistence: Establishing a Bermuda grass lawn from sprigs takes time; consistent care and attention will lead to a dense, resilient turf.
Understanding Bermuda Grass Sprigs
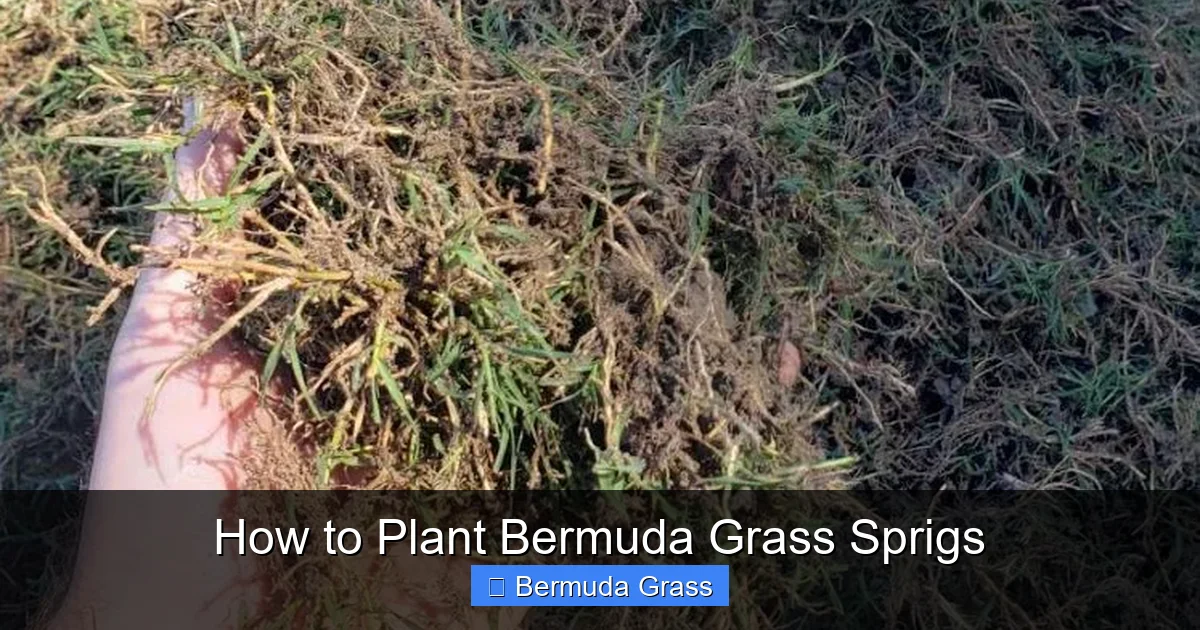
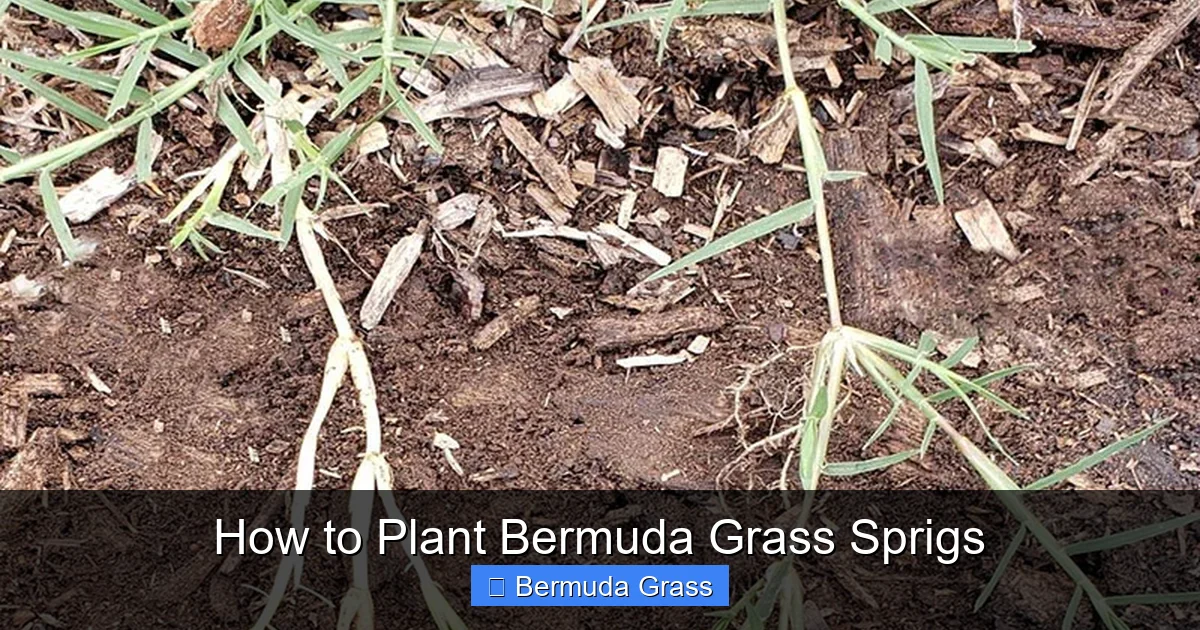
Before we dive into the “how-to,” let’s quickly understand what Bermuda grass sprigs are. Sprigs are small pieces of the grass plant, typically consisting of a short piece of stolon (above-ground stem) or rhizome (underground stem) with a few nodes and sometimes a bit of root. These nodes are where new growth and roots will emerge. Planting sprigs is essentially giving these little grass snippets the best possible start to establish a new lawn. It’s a method that requires patience but is often much more affordable than sodding, especially for larger areas.
When is the Best Time to Plant Bermuda Grass Sprigs?
Timing is one of the most critical factors for success when planting Bermuda grass sprigs. This warm-season grass thrives in heat.
Optimal Planting Window
The ideal time to plant Bermuda grass sprigs is when your soil temperatures are consistently above 65°F (18°C) and rising. This typically falls between **late spring and early summer** in most warm-season climates. Planting during this period allows the sprigs to establish roots and begin spreading before the intense heat of mid-summer or the cooler temperatures of fall arrive.
Why Spring/Early Summer is Ideal
* **Warm Soil Temperatures:** Bermuda grass needs warm soil to germinate and root effectively. Cool soil can stunt growth or even kill the sprigs.
* **Long Growing Season:** Planting in late spring or early summer provides a long growing season for the sprigs to mature and spread before winter dormancy.
* **Adequate Rainfall:** Spring often brings more consistent rainfall, which is crucial for newly planted sprigs. However, you’ll still need to supplement with watering.
What to Avoid
* **Cool Weather:** Do not plant sprigs when there is a risk of frost or when temperatures are consistently below 65°F.
* **Late Fall:** Planting too late in the fall won’t give the sprigs enough time to establish before winter.
Step 1: Prepare Your Site Like a Pro
Proper site preparation is the absolute cornerstone of a successful Bermuda grass lawn, whether you’re using sprigs, seed, or sod. This is not a step to rush!
Clearing the Area
First, you need to clear the entire area where you plan to plant.
Remove Existing Vegetation
* **Weeds and Grass:** Thoroughly remove all existing weeds and grass. You can do this by digging them out by hand, using a sod cutter, or applying a non-selective herbicide. If using herbicide, follow the product instructions carefully and wait for it to kill the existing vegetation before proceeding.
* **Debris:** Clear away any rocks, sticks, old roots, or other debris. A clean slate is essential.
Leveling the Ground
Once cleared, you’ll want to level the ground.
* **Fill Low Spots:** Use a good quality topsoil or compost to fill in any low-lying areas.
* **Remove High Spots:** Grade down any elevated areas to ensure a smooth, even surface. This helps with proper drainage and prevents water from pooling in certain spots.
Cultivating the Soil
Bermuda grass needs loose, well-drained soil to establish its root system.
Till or Aerate
* **Tilling:** Use a rototiller to break up the soil to a depth of at least 4-6 inches. This loosens compacted soil, allowing roots to penetrate easily.
* **Aeration:** If your soil is heavily compacted clay, core aeration can be beneficial. It pulls out plugs of soil, creating channels for air, water, and nutrient penetration.
Amend the Soil
* **Soil Test:** It’s highly recommended to get a soil test. This will tell you the pH and nutrient levels of your soil. Bermuda grass prefers a slightly acidic to neutral pH (6.0-7.0).
* **Add Organic Matter:** Incorporate plenty of organic matter, such as compost, well-rotted manure, or peat moss. This improves soil structure, drainage, and fertility. Mix it in thoroughly with the tilled soil.
* **Fertilize:** Based on your soil test results, add any necessary amendments or fertilizers. A good starter fertilizer with a higher phosphorus content (the middle number in N-P-K ratios) is beneficial for root development. Work it into the top 3-4 inches of soil.
Final Raking
After tilling, amending, and fertilizing, rake the area smooth. Remove any remaining small rocks or debris. The goal is a fine, firm seedbed that is free of large clumps.
Step 2: Planting the Bermuda Grass Sprigs
Now for the exciting part – getting those sprigs into the ground! The goal here is to ensure good contact between the sprigs and the soil.
Spacing Your Sprigs
The density at which you plant will determine how quickly your lawn fills in.
* **Closer Spacing:** Planting sprigs closer together (e.g., 4-6 inches apart) will result in a faster establishment and a denser lawn sooner. This is more expensive due to the number of sprigs needed but offers quicker coverage.
* **Wider Spacing:** Planting sprigs further apart (e.g., 8-12 inches apart) is more economical but will take longer for the lawn to fill in. You might need to fill in gaps with additional sprigs or sod later.
Planting Methods
There are a few common methods for planting sprigs:
Method 1: Dibble Planting (Individual Holes)
This is a very common and effective method for smaller areas or for more precise placement.
* **Create Holes:** Use a dibble tool, a trowel, or even a piece of rebar to poke holes in the prepared soil. The holes should be about 3-4 inches deep.
* **Place Sprigs:** Take a sprig and place at least one node (where leaves emerge) below the soil surface. The goal is to have the node buried, with the leafy top emerging.
* **Backfill and Firm:** Gently push soil back into the hole, covering the buried node. Firm the soil around the sprig with your fingers or the dibble tool to ensure good soil contact.
Method 2: Furrow Planting
This method is efficient for larger areas.
* **Create Furrows:** Use a hoe or a tiller with a furrower attachment to create shallow furrows, about 3-4 inches deep.
* **Place Sprigs:** Lay the sprigs in the furrows, ensuring that at least one node is buried beneath the soil surface.
* **Cover and Firm:** Cover the sprigs with soil, then gently pack it down with your feet or a rake.
Method 3: Broadcasting and Raking (Less Common for Sprigs)
While more common for seed, some people lightly broadcast sprigs and then lightly rake them in. This is generally less effective for sprigs as it’s harder to ensure nodes are consistently in contact with the soil. If you use this method, ensure the sprigs are lightly covered and then rolled or firmed.
Ensuring Soil Contact
No matter which method you choose, the most important aspect is ensuring that the nodes of the sprigs are in firm contact with the soil. This is where the roots and new shoots will emerge. If the nodes are exposed to air, they are likely to dry out and die.
Rolling (Optional but Recommended)
After planting, lightly rolling the area with a lawn roller can be very beneficial. This further compacts the soil around the sprigs, ensuring excellent soil-to-sprig contact and eliminating air pockets. Don’t over-compact, just firm the soil.
Step 3: Watering – The Lifeline for New Sprigs
Newly planted Bermuda grass sprigs are highly dependent on consistent moisture. This is arguably the most critical ongoing task for the first few weeks.
Initial Watering
* **Immediate Watering:** Water the newly planted area immediately after planting. You want to saturate the soil to settle it around the sprigs and begin the establishment process.
Frequency and Amount
* **Frequent Light Watering:** For the first 1-2 weeks, you will need to water frequently, often multiple times a day. The goal is to keep the top inch of soil consistently moist, but not waterlogged. Check the soil moisture by pushing your finger into the ground; if it feels dry, it’s time to water.
* **Deeper, Less Frequent Watering:** As the sprigs begin to root and show new growth (you’ll start to see tiny green shoots emerging), you can gradually reduce the frequency of watering but increase the duration. Aim for deep watering that moistens the soil several inches down. This encourages deeper root growth, making the grass more drought-tolerant.
* **Monitor Conditions:** Adjust watering based on weather conditions. Hot, windy days will require more frequent watering than cool, overcast days.
Step 4: Fertilizing for Strong Growth
While you likely incorporated a starter fertilizer during site preparation, continued feeding will support your sprigs’ development.
Starter Fertilizer
* **At Planting:** As mentioned, a starter fertilizer (e.g., 10-20-10 or similar with a higher middle number for phosphorus) is excellent for encouraging root establishment.
Follow-up Fertilization
* **After First Mowing:** Once your sprigs have grown enough to be mowed for the first time (usually when they reach about 1.5-2 inches in height), you can begin a regular fertilization schedule.
* **Balanced Fertilizer:** Use a balanced lawn fertilizer (e.g., 16-16-16 or similar). Apply according to the product’s instructions.
* **Frequency:** Bermuda grass is a heavy feeder. Fertilize every 4-6 weeks throughout the growing season to promote vigorous growth and density.
Step 5: Mowing and Weed Control
As your Bermuda grass sprigs begin to grow and spread, you’ll need to start mowing and keeping weeds at bay.
First Mowing
* **Wait for Height:** Do not mow until the grass is at least 1.5 to 2 inches tall and has started to fill in. Mowing too early can pull out the young sprigs.
* **Set Mower High:** Set your mower to a higher cutting height for the first few mows. This encourages the grass to spread and thicken.
* **Sharp Blades:** Always use a mower with sharp blades to make clean cuts and avoid tearing the young grass.
Weed Management
Weeds are the biggest enemy of new Bermuda grass. They will compete for water, nutrients, and sunlight, hindering your lawn’s establishment.
* **Hand Pulling:** For the first few weeks, hand-pulling weeds is the safest and most effective method, especially before the grass is established enough for herbicides. Get the entire root if possible.
* **Pre-Emergent Herbicides:** Once the Bermuda grass is growing well and has been mowed a few times, you can consider a pre-emergent herbicide to prevent annual weeds from germinating. Be sure to choose a product labeled as safe for newly established Bermuda grass.
* **Post-Emergent Herbicides:** If necessary, use a post-emergent herbicide, but be extremely cautious. Always select a product specifically labeled for use on Bermuda grass and follow application rates precisely. Applying herbicides too early or at too high a rate can damage or kill your new lawn.
Step 6: Ongoing Care and Patience
Establishing a lawn from sprigs takes time and consistent effort.
Watering
Continue with a regular watering schedule. As the lawn matures, it will become more drought-tolerant, but still needs adequate water, especially during hot, dry periods. Deep, infrequent watering is best for a healthy, established lawn.
Fertilizing
Maintain a regular fertilization schedule throughout the growing season. This will keep your Bermuda grass healthy, green, and dense.
Mowing
As the lawn thickens, you can gradually lower your mowing height to the desired level for Bermuda grass (typically 0.5 to 2 inches, depending on the variety and mowing equipment). Continue mowing regularly to encourage density.
Pest and Disease Control
Monitor your lawn for any signs of pests or diseases. Address any issues promptly. Healthy, well-maintained Bermuda grass is less susceptible to problems.
Patience is a Virtue
Don’t get discouraged if your lawn doesn’t look perfect immediately. It can take several weeks to months for the sprigs to spread and fill in completely, especially if planted at wider intervals. Keep up with your watering, fertilizing, and weed control, and your patience will be rewarded with a beautiful, dense Bermuda grass lawn.
Troubleshooting Common Issues
* **Sprigs Not Growing:**
* **Cause:** Poor soil contact, insufficient watering, or planting during too cool temperatures.
* **Solution:** Ensure good soil contact. Water consistently. Check soil temperatures. If planting in spring, ensure soil is consistently warm.
* **Weeds Taking Over:**
* **Cause:** Weeds germinating before or alongside the Bermuda grass, lack of consistent weed management.
* **Solution:** Prioritize hand-pulling. Use appropriate pre-emergent and post-emergent herbicides cautiously once the grass is established.
* **Yellowing Grass:**
* **Cause:** Nutrient deficiency (especially nitrogen), overwatering, or poor drainage.
* **Solution:** Fertilize with a balanced lawn fertilizer. Ensure proper drainage and adjust watering.
* **Bare Patches:**
* **Cause:** Poor sprig quality, inconsistent watering, or pest/disease issues.
* **Solution:** Plant healthy sprigs. Ensure consistent moisture. Investigate potential pest or disease problems and treat accordingly. You may need to replant or overseed these areas.
Conclusion
Planting Bermuda grass sprigs is a rewarding process that can result in a stunning, low-maintenance lawn. By carefully preparing your soil, choosing the right planting time, and providing consistent care with watering and fertilization, you can establish a dense, resilient turf that will be the envy of your neighborhood. Remember that patience is key. It takes time for those small sprigs to spread and fill in, but the effort is well worth the outcome. Enjoy your beautiful, thriving Bermuda grass lawn!
