
Growing Bermuda grass from seed can be a rewarding process, leading to a dense, resilient, and beautiful lawn. This guide provides a detailed, step-by-step approach, covering everything from site preparation and seed selection to proper watering and ongoing maintenance. By following these instructions, you can successfully establish a healthy Bermuda grass lawn that thrives in warm weather conditions.
How to Grow Bermuda Grass from Seed
Dreaming of a lush, green, and resilient lawn that can withstand the heat of summer? Bermuda grass might be your perfect solution. While often associated with sod installation, growing Bermuda grass from seed is an achievable and cost-effective way to establish this popular warm-season turf. This comprehensive guide will walk you through every step, from preparing your soil to celebrating your new, vibrant lawn. We’ll cover everything you need to know to give your Bermuda grass seeds the best possible start, ensuring a thick, beautiful turf that will be the envy of your neighbourhood.
Bermuda grass is renowned for its exceptional heat tolerance, drought resistance, and ability to recover quickly from wear and tear. It thrives in warmer climates and forms a dense, attractive turf once established. While it goes dormant and turns brown in cooler temperatures, its resilience during the growing season makes it a favorite for many homeowners. Growing it from seed offers a budget-friendly alternative to sod and allows you to cultivate a lawn perfectly suited to your specific conditions.
Key Takeaways
- Optimal Timing is Crucial: Bermuda grass is a warm-season grass, so planting seeds in late spring or early summer when soil temperatures consistently reach 65-70°F (18-21°C) is essential for germination.
- Soil Preparation is Paramount: A well-prepared seedbed, free of debris and weeds, with loosened soil and improved drainage, significantly increases your chances of successful germination and establishment.
- Seed Selection Matters: Choose high-quality Bermuda grass seed varieties suited to your climate and desired lawn characteristics for the best results.
- Proper Seeding Technique: Evenly distribute the seed and ensure good seed-to-soil contact by lightly raking and rolling to promote consistent germination.
- Consistent Moisture is Key: Keep the newly seeded area consistently moist, but not waterlogged, during the germination period and the first few weeks of growth.
- Fertilization for Growth: Once the grass is established, regular fertilization with nitrogen-rich products will promote vigorous growth and a dense turf.
- Patience and Persistence: Growing Bermuda grass from seed requires patience; it can take several weeks to see significant germination and several months for the lawn to mature fully.
Understanding Bermuda Grass
Before you grab your seed bag, it’s helpful to understand a little about Bermuda grass. It’s a perennial, warm-season grass, meaning it grows actively during the hot months and goes dormant (turns brown) when temperatures drop significantly. This characteristic is important to remember when planning your planting schedule. Its deep root system makes it remarkably drought-tolerant once established, and it spreads aggressively through rhizomes and stolons, forming a dense mat that can outcompete many weeds.
Step 1: Timing is Everything – When to Plant Bermuda Grass Seed
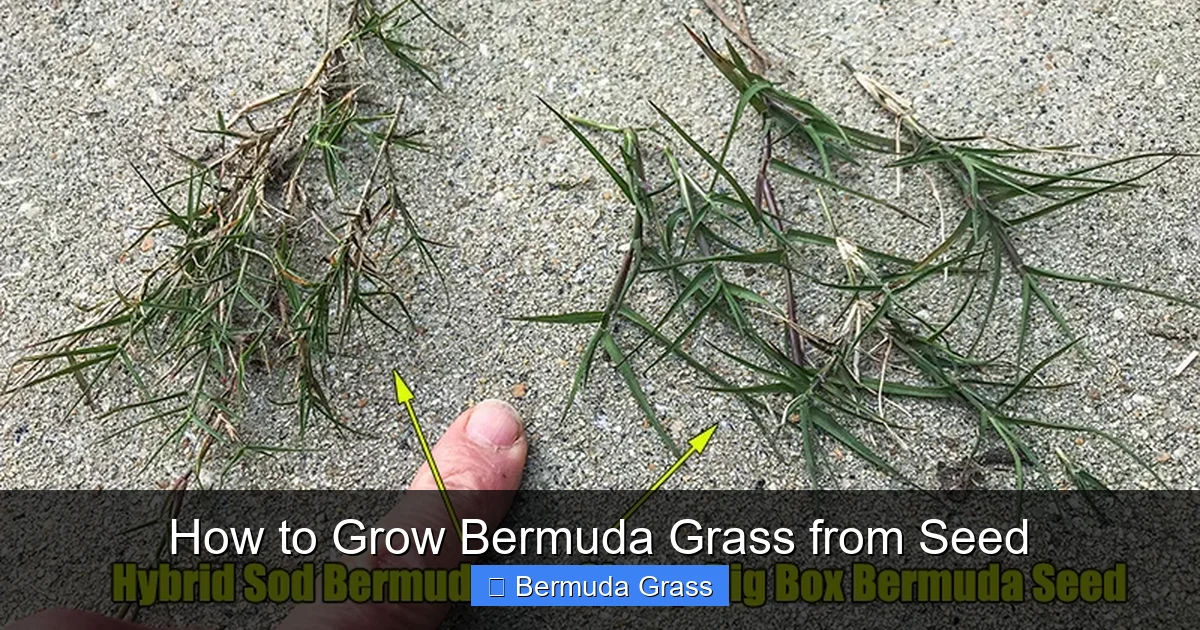
The most crucial factor in successfully growing Bermuda grass from seed is timing. Because it’s a warm-season grass, it needs consistently warm soil and air temperatures to germinate and thrive. Planting at the wrong time can lead to poor germination rates and weak seedling growth.
Visual guide about How to Grow Bermuda Grass from Seed
Image source: howtowithdoc.com
Ideal Planting Windows
- Late Spring to Early Summer: This is the prime time to plant Bermuda grass seed. Aim for when your region’s soil temperature has consistently reached at least 65°F (18°C) and is expected to stay warm. In most parts of the Southern United States, this translates to late April through July.
- Soil Temperature is Key: Don’t rely solely on air temperature. Use a soil thermometer to confirm that the top 2-3 inches of soil are consistently between 65°F and 70°F (18°C and 21°C).
- Avoid Planting in Cooler Months: Planting in fall or early spring when temperatures are cool will result in very slow germination, if any, and the young seedlings will likely not survive the cooler weather.
Practical Tip: Monitor local weather forecasts. Avoid planting right before a prolonged cold snap or a period of heavy, unexpected rain that could wash away your seeds.
Step 2: Preparing the Seedbed – The Foundation for Success
A well-prepared seedbed is non-negotiable for successful Bermuda grass establishment. This step involves clearing the area, loosening the soil, and improving its quality.

Visual guide about How to Grow Bermuda Grass from Seed
Image source: i.ytimg.com
Clearing the Area
- Remove Debris: Clear away any rocks, sticks, old plant material, and other debris from the area where you plan to plant.
- Eradicate Existing Weeds: This is a critical step. You want to give your Bermuda grass the best chance to establish without competing with established weeds.
- Manual Removal: For small areas, pull weeds by hand, ensuring you get the roots.
- Herbicides: For larger areas, consider using a non-selective herbicide. Follow the product instructions carefully and wait for the recommended period before proceeding with soil preparation to ensure the herbicide has broken down.
Improving the Soil
- Loosen the Soil: Bermuda grass seeds need good contact with the soil to germinate. Use a tiller, garden fork, or spade to loosen the top 4-6 inches of soil. This also improves drainage and aeration, which are vital for healthy root development.
- Amend the Soil: Bermuda grass prefers well-drained soil. If your soil is heavy clay, incorporate organic matter like compost or well-rotted manure to improve drainage and fertility. For sandy soils, organic matter helps retain moisture and nutrients.
- Soil Test: Consider getting a soil test to determine your soil’s pH and nutrient levels. Bermuda grass generally prefers slightly acidic to neutral pH (6.0-7.0). Amend the soil based on the test results with lime to raise pH or sulfur to lower it, and add necessary nutrients.
- Level the Area: After loosening and amending, rake the area smooth, removing any remaining clumps or debris. Aim for a relatively level surface to ensure even watering and mowing later on.
Practical Tip: After tilling and amending, let the soil rest for a week or two if possible. This allows any dormant weed seeds that were brought to the surface to germinate, and you can then lightly till or remove them again before seeding.
Step 3: Choosing the Right Bermuda Grass Seed
Not all Bermuda grass seeds are created equal. Different varieties offer varying characteristics in terms of color, density, texture, and disease resistance. Purchasing from a reputable supplier is also important.

Visual guide about How to Grow Bermuda Grass from Seed
Image source: i.ytimg.com
Selecting a Variety
- Common Bermuda Grass: This is the most common and widely available type. It’s very hardy and aggressive but can have a coarser texture and may be more prone to certain diseases. It’s also often the most cost-effective.
- Hybrid Bermuda Grasses: These are typically developed for superior traits like finer texture, darker green color, and improved disease resistance. However, many hybrid Bermuda grasses are sterile and are primarily propagated by sod or plugs, not seed. Always verify if a hybrid variety is specifically bred for seeding.
- Specialty Seed Blends: Look for seed blends specifically formulated for your region or for seeding. These may contain a mix of improved common Bermuda varieties or be coated with nutrients and fungicides to aid germination and early growth.
Key Factors to Consider
- Climate: Ensure the variety you choose is well-suited to your local climate.
- Desired Appearance: Do you want a very fine-textured, dark green lawn, or is a more robust, slightly coarser turf acceptable?
- Disease Resistance: Some varieties offer better protection against common lawn diseases.
- Seed Quality: Purchase from a reputable seed supplier to ensure you’re getting pure, viable seed free from weed seeds. Check the seed tag for germination rates and purity.
Practical Tip: If you’re unsure which variety to choose, consult with your local agricultural extension office or a reputable garden center for recommendations tailored to your area.
Step 4: Seeding the Bermuda Grass
This is the exciting part! Proper seeding technique ensures even coverage and good seed-to-soil contact, which are vital for successful germination.
Applying the Seed
- Use a Spreader: For even application, a broadcast spreader (for larger areas) or a drop spreader (for more precise application) is highly recommended.
- Follow Seeding Rates: Check the seed packaging for recommended seeding rates. Over-seeding can lead to competition among seedlings, while under-seeding will result in a sparse lawn. A typical seeding rate for Bermuda grass is around 1-2 pounds per 1,000 square feet.
- Apply in Two Directions: To ensure even coverage, apply half the seed going in one direction (e.g., north-south) and the other half going in the perpendicular direction (e.g., east-west).
Ensuring Seed-to-Soil Contact
- Light Raking: After spreading the seed, lightly rake the area with a garden rake. The goal is to gently push the seed into the top 1/4 inch of soil without burying it too deeply. Seeds need to be in contact with moist soil to germinate.
- Rolling (Optional but Recommended): For optimal seed-to-soil contact, gently roll the seeded area with a lightweight lawn roller. This firms the soil around the seeds, ensuring they are nestled in. Avoid heavy rollers, which can compact the soil.
Practical Tip: Many Bermuda grass seeds are coated with a protective layer that may be colored. This is normal and can help with visibility during application.
Step 5: Watering – The Lifeline for New Seeds
Consistent moisture is absolutely critical for Bermuda grass seed germination and the early survival of seedlings. During this phase, the soil should be kept perpetually moist.
Initial Watering
- Gentle Watering: Immediately after seeding, water the area thoroughly but gently. Use a fine mist or a sprinkler with a fine spray setting to avoid washing the seeds away.
- Keep it Moist: This is the most important part. The top 1-2 inches of soil must remain consistently moist until the seedlings are well-established (usually 3-4 weeks). This might mean watering multiple times a day, especially in hot or windy weather.
- Check Moisture Levels: Don’t just guess. Periodically touch the soil surface. If it feels dry, it’s time to water.
As Seedlings Grow
- Gradually Reduce Frequency: Once seedlings begin to emerge and grow, you can gradually start watering less frequently but more deeply. This encourages the roots to grow deeper into the soil.
- Deep Watering: Aim to water deeply enough to moisten the soil several inches down. This helps build drought tolerance.
Practical Tip: Consider using a hose-end sprinkler that provides a gentle, consistent spray. For very small areas, a watering can with a fine rose attachment can work well.
Step 6: Fertilizing for Growth
Once your Bermuda grass seedlings have emerged and are showing some growth, it’s time to provide them with nutrients to support vigorous development.
First Fertilization
- Wait for Establishment: Do not fertilize immediately after seeding. Wait until the seedlings have been mowed at least once or twice, indicating they are establishing a healthy root system.
- Starter Fertilizer: Use a “starter” fertilizer, which is typically low in nitrogen and higher in phosphorus. Phosphorus is crucial for root development.
- Application: Apply the fertilizer according to the product’s instructions. Follow the recommended rates carefully, as over-fertilizing can burn new seedlings.
Ongoing Fertilization
- Nitrogen-Rich Fertilizers: As the Bermuda grass matures, it will benefit from regular fertilization with nitrogen-rich lawn fertilizers. Nitrogen promotes lush, green growth.
- Seasonal Feeding: Bermuda grass actively grows in warm weather. Fertilize during its active growing season, typically from late spring through early fall.
- Follow Instructions: Always adhere to the recommended application rates and frequency for your chosen fertilizer.
Practical Tip: Many Bermuda grass seeds are coated with a starter fertilizer. Check your seed packaging to see if this is the case, and adjust your initial fertilization schedule accordingly.
Step 7: Mowing and Early Care
Mowing is an essential part of managing your Bermuda grass lawn, but it needs to be done correctly, especially in the early stages.
First Mowing
- When to Mow: Mow for the first time when the grass reaches about 1.5 to 2 inches in height.
- Use a Sharp Mower: Always use a mower with sharp blades. Dull blades tear the grass, making it susceptible to disease.
- High Mowing Height: Set your mower to a higher setting for the first few mows. This helps the young grass develop a stronger root system.
- Never Remove More Than One-Third: As a general rule for any lawn mowing, never remove more than one-third of the grass blade at a time.
Ongoing Mowing
- Lowering the Height: As the Bermuda grass matures and thickens, you can gradually lower the mowing height. Bermuda grass can be mowed very short, sometimes as low as 1/2 inch, but this requires a well-maintained and dense turf.
- Regular Mowing: During its peak growing season, you may need to mow 2-3 times a week to keep it at your desired height.
Practical Tip: Keep your mower clean. Grass clippings can sometimes clog the mower deck, especially when mowing frequently.
Troubleshooting Common Issues
Even with the best efforts, you might encounter a few challenges.
Poor Germination
- Possible Causes: Incorrect timing (too cold/hot), insufficient moisture, poor seed-to-soil contact, old or low-quality seed.
- Solution: Ensure you are planting in the correct warm-season window. Keep the area consistently moist. Rake and roll the seeds to ensure good contact. If germination is very poor, consider re-seeding the following year with fresh seed and a well-prepared bed.
Weeds Taking Over
- Possible Causes: Incomplete weed removal during preparation, weeds spreading from surrounding areas. Bermuda grass is aggressive, but during the slow establishment phase, weeds can get a foothold.
- Solution: The best defense is a good offense – thorough weed removal before seeding. Once Bermuda grass is established, its dense growth will help suppress weeds. Hand-pulling is effective for scattered weeds. Be cautious with herbicides on young seedlings; always check labels for grass safety.
Bare Patches
- Possible Causes: Uneven seed distribution, poor soil contact, excessive moisture in localized spots, disease, or pest issues.
- Solution: Address the specific cause. If it’s due to poor seeding, you may need to overseed those areas once the main lawn is established. Ensure good drainage and avoid overwatering.
Conclusion
Growing Bermuda grass from seed is a rewarding process that, with careful planning and execution, can result in a beautiful, resilient lawn. By paying close attention to the timing of your planting, diligently preparing your seedbed, selecting quality seed, and providing consistent moisture and care, you’ll be well on your way to achieving a lush, green carpet of Bermuda grass. Remember that patience is a virtue; it takes time for these warm-season seeds to germinate and mature into a full, dense turf. Embrace the journey, enjoy the process, and soon you’ll be enjoying the many benefits of your home-grown Bermuda grass lawn.